

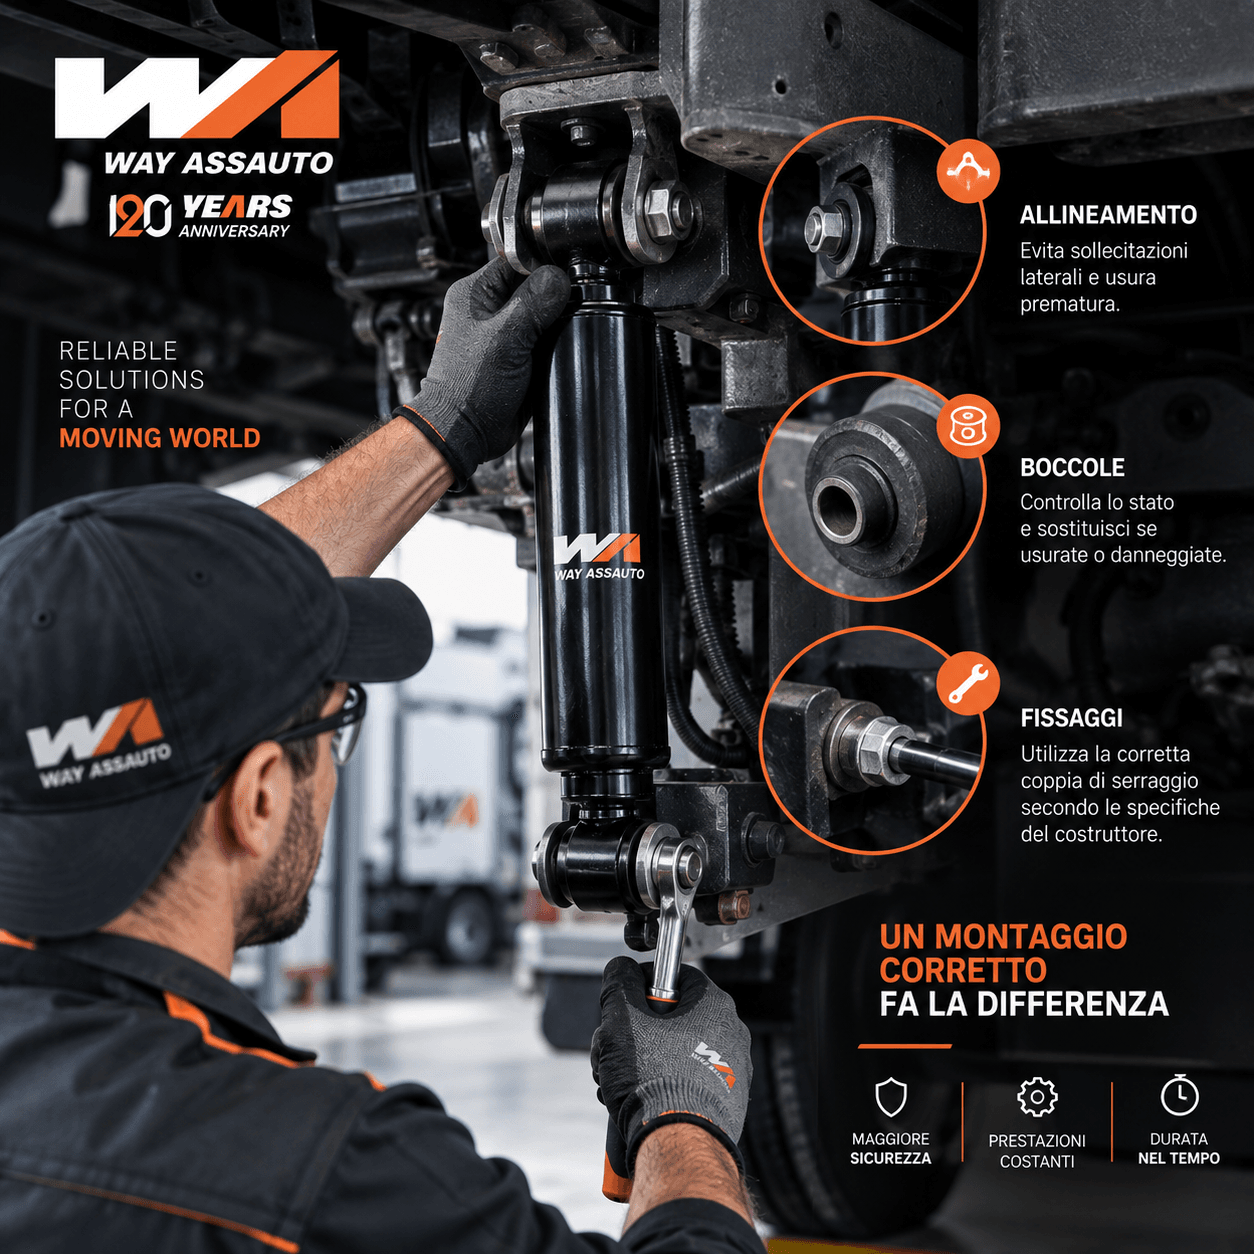
Truck shock absorber assembly errors: alignment, bushings and fixings
The truck shock absorber assembly errors they can compromise the correct functioning of a new component and cause noise, play, abnormal stress or premature deterioration.
The quality of the shock absorber is in fact only part of the intervention. Part compatibility, condition of mounting points, alignment and correct tightening procedure are equally important.
During replacement it is therefore necessary to consider the entire connection between shock absorber and suspension, avoiding focusing exclusively on the new component.
Let's see what the main mistakes to avoid are.
Why is the correct assembly of truck shock absorbers important?
The shock absorber controls the oscillations generated by suspension movements and road irregularities.
To work in the expected conditions, it must be installed correctly and compatible with the specific application.
Incorrect assembly can subject the stem, bushings, connections and supports to stresses different from those foreseen during the design.
Over time the following may therefore appear:
- noise;
- clearances in the fixing points;
- deterioration of the bushings;
- vibrations;
- abnormal wear;
- losses;
- damage to the supports.
However, the presence of one of these signals does not automatically indicate an installation error. You need to examine your system to find the cause.
Error 1: shock absorber not correctly aligned
One of the main ones truck shock absorber assembly errors concerns the misalignment between the fixing points.
During installation, the shock should not be forced sideways to reach the upper or lower mount.
A condition of misalignment can in fact generate unexpected lateral loads on the component and subject the stem, guide and sealing system to anomalous stresses.
Before installation it is therefore advisable to check:
- condition of the brackets;
- integrity of media;
- location of the attacks;
- any deformations;
- presence of significant corrosion;
- compatibility of the spare part.
A leak that appears after replacement should therefore not be automatically attributed to a defect in the shock absorber: during the diagnosis it is advisable to also check the installation, connections and conditions of the surrounding elements.
Mistake 2: Use bushings that are already worn or damaged
The bushings are fundamental elements in the connection points of the shock absorber.
Way Assauto highlights in its technical contents that their deterioration can be associated with play, noise, vibrations and greater stress on the fixing points.
When replacing a shock absorber it is therefore important to also check:
- bushings;
- pins;
- supports;
- assembly locations;
- hardware;
- any spacers.
Installing a new shock absorber on already damaged fixing points can compromise the quality of the intervention.
Cracks, deformations, deteriorated rubber and abnormal play are signs that require a more thorough inspection.
Mistake 3: Using an apparently compatible replacement
Two shock absorbers can look almost identical and have similar dimensions without necessarily being interchangeable.
Before installation you need to check features such as:
- OE code;
- application;
- mounting position;
- minimum and maximum length;
- corsa;
- typology of attacks;
- bushing dimensions;
- any further specifications of the component.
The Way Assauto website underlines that shape and size are not sufficient to identify a shock absorber: even dimensionally similar products can be intended for different applications or have different damping characteristics.
Error 4: incorrect tightening torque
Tightening the fixing points also requires attention.
Insufficient fixing can generate play and unwanted movements. However, tightening that does not comply with specifications can subject bushings, bolts and supports to conditions different from those expected.
There is no universal tightening torque that applies to all truck shock absorbers.
The correct value depends on the vehicle, the attachment configuration, the bolts and the technical indications provided for that specific application.
It is therefore necessary to use adequate tools, such as a torque wrench when required, and respect the values and procedures indicated by the manufacturer.
Mistake 5: Tighten the spring bushings in the wrong position
In certain configurations, the position of the suspension during tightening can also be important.
When there are elastic bushings that work through a controlled deformation, an incorrect assembly procedure can subject them to an initial condition different from that expected.
However, there is no universal procedure applicable without distinction to all industrial vehicles.
For this reason, you must always check the instructions provided by the vehicle manufacturer or the technical documentation relating to the application before carrying out the final tightening.
Error 6: reuse fixings that are no longer suitable
Nuts, bolts, washers, pins and spacers are part of the shock connection system.
They must be carefully monitored during the operation.
Deformed, corroded or damaged elements can compromise correct fixing even when the shock absorber is new.
When the technical procedure prescribes the replacement of certain fasteners, they should not be reused.
What to check after fitting a shock absorber
Once the installation has been completed, it is advisable to carry out a general check.
Depending on the application and the procedures envisaged, the control may include:
- shock absorber position;
- correct insertion of the bindings;
- condition of the bushings;
- presence of the required fixings;
- absence of interference;
- distance from pipes and wiring;
- absence of anomalous contacts with other components;
- correct suspension movement.
In pneumatic systems, attention must also be paid to the surrounding elements, such as air springs, pipes and connections.
Any subsequent tightening checks must instead be carried out when required by the manufacturer's specific procedure.
Noise after replacement: is it always the shock absorber's fault?
No.
If a noise appears after installation, replacing the shock absorber again without carrying out a diagnosis may not solve the problem.
The cause could be found, for example, in:
- bushings;
- supports;
- fixings;
- games in links;
- other suspension components.
Way Assauto indicates the bushings and connection points between the elements to be checked during maintenance of the suspension system.
For this reason the diagnosis should consider the entire system and not just the individual shock absorber.
How to avoid truck shock absorber assembly errors
Correct replacement starts before the tools are even used.
The first step consists in identifying the correct spare part through OE code, vehicle, mounting position, connections and technical characteristics.
Subsequently, the components to which the new shock absorber will be connected must be checked.
Finally, the installation must be carried out respecting the procedures and values prescribed for the specific application.
In summary:
- correctly identifies the spare part;
- compare attacks and characteristics;
- check bushings and supports;
- check the alignment;
- checks bolts and fixings;
- applies the procedures and pairs provided;
- Test the system after installation.
Way Assauto truck shock absorbers
The truck shock absorber assembly errors demonstrate why the quality of the spare part must be accompanied by correct identification and installation.
Way Assauto develops and produces shock absorbers for trucks, buses, trailers and other applications in the transport sector. On its website it also provides technical information to identify the component through measurements, connections, mounting position and OE codes.
Choosing the correct spare part and respecting the procedures required for the application allows the component to work in the conditions for which it was designed.
Leave a Reply